Storific

About Us Why Storific? How it works Press Press Coverage Contact Us

Overall process

The first thing that the business does is entering its menu and tables on its interface. This needs to be done only once.

Then, when a customer is seated at a particular table, the business gives a special code known as a “checkin code” to the customer. This code is read on the business’ interface and is associated with the table where the customer is seated.

The customer enters this code in the iPhone app and proceeds to place his order. The business sees the order on its interface along with the table where it came from. With this information, the order can be dispatched.

Details about the process

Enter your tables

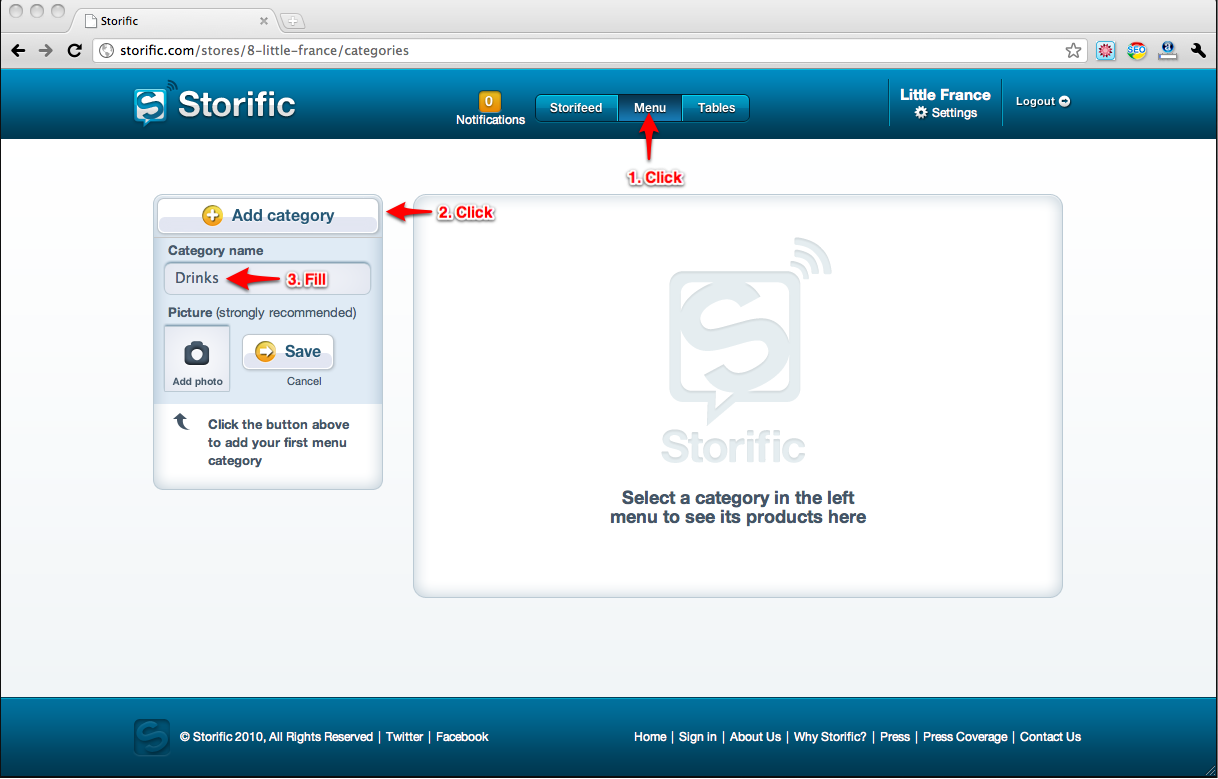
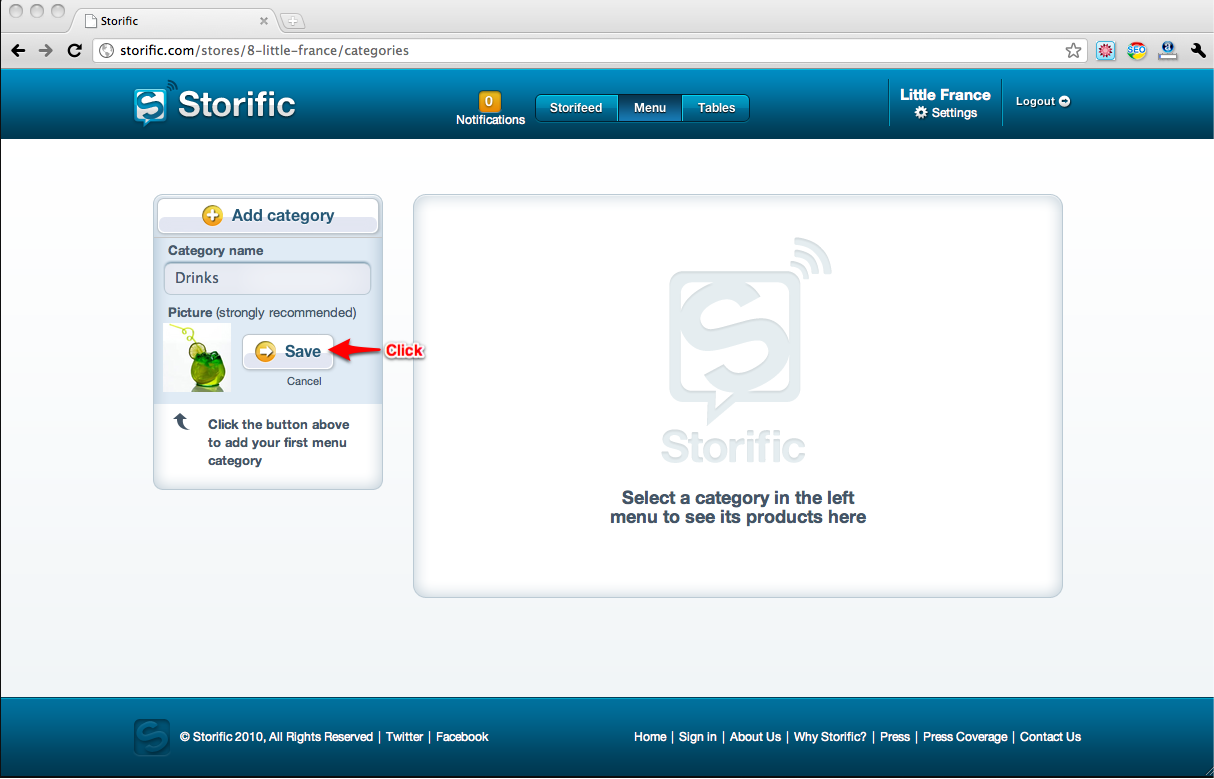
To enter your tables, click on the “Tables” button on the top menu. Then click on the “Add new table” button. A little form will appear where you can enter your table’s number or identifier. Then click “Add”:

Storific

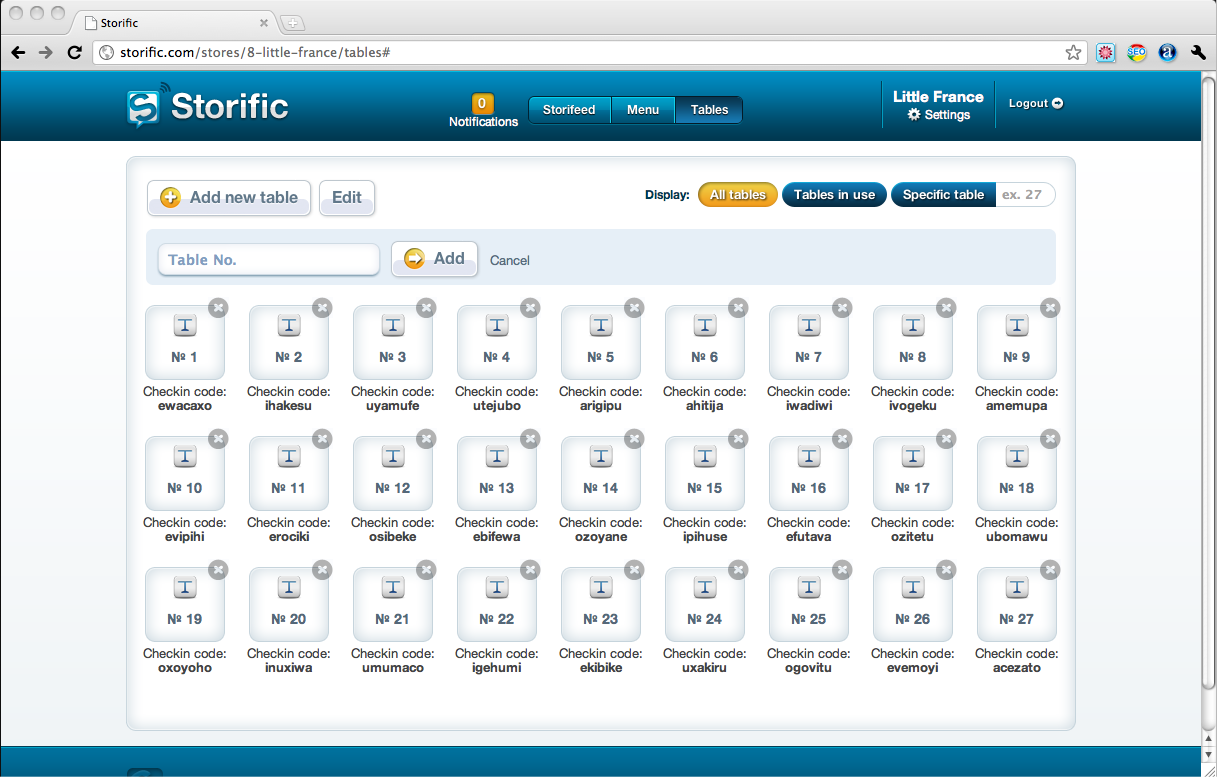
Once you have finished entering your tables, you’ll see something like this:

Storific

Enter your menu

To enter your menu, start by selecting the “Menu” section on the top navigational bar.

You menu is divided in categories. You can have as many categories as you want and each product must belong to one category. Some sample categories might be “Drinks”, “Pizza” or “Desserts”.

To add your first category, click on the “Add category” button on the left. This will show a little form where you can enter the details. The name of the category is mandatory. The picture is optional but highly recommended:

Storific

To add a picture, click the “Add photo” image and a new window will pop up asking for the picture file that you want to associate with this category. Select the file:

Storific

After you have uploaded the file, you’ll see it appear in the form. Then click “Save” to save the new category:

Storific

You will now see the category and be able to add products to it. To do so, click the “Add a new product” button and fill the form. Again, pictures are optional but highly recommended.

Storific
After you click “Save”, you’ll see a confirmation message. The product is now visible in the iPhone app:
Storific

You can alternatively add options to products. For example, imagine you have an ice cream that can be accompanied by a sauce chosen by the user. You can create the product “Ice Cream” and add “Chocolate”, “Strawberry” and “Caramel” to the “Sauce” option. To do that, click the link that says “Product options”. A new form will appear where you can create the options or choose existing options from other products. You can create as many options as you want. In our example, let’s add a “Size” option with two possible choices: “Small” and “Big”:

Storific
Find a checkin code for a table

To find out what’s the checkin code that you should handle to your clients, go to the “Tables” section.
Below each unoccupied table, there’s a checkin code. Write down in a card the code below the table where the customer is seated and handle it to him:

Storific

Once your client has received the checkin code and used it in the iPhone app, your interface will change to reflect this change. The table will now have a blue indicator that tells how many new orders have been placed from this table:

Storific
See your customer’s orders

Whenever a customer places a new order, the orange “Notifications” indicator on the top left corner will update with the number of pending orders that need immediate attention. The indicator on the “Tables” section will also update:

Storific

If you click on the orange “Notifications” indicator, you will see a page with all the new orders. If you click the indicator above the table, you will see a page with all the orders from that table. Alternatively, you can click on the “Storifeed” section to see all orders from all tables (including unread and read orders). Let’s do that:

Storific

You have two options for a given order: either mark it as handled or mark some of its products as unavailable. In the first case, a notification will be sent to the customer’s iPhone saying that the order has been received and it will be delivered soon. In the second case, a notification will be sent to the customer’s iPhone saying that that product is not available.

To mark an order as handled, click the “Mark as handled” button:

Storific

To mark an item as not available, hover over it and click the floating exclamation symbol:

Storific

Once you do that, it’ll be marked as “Not available” in your interface:

Storific
© Storific 2010, All Rights Reserved | Twitter | Facebook
Home | Sign in | About Us | How it Works | Why Storific? | Press | Press Coverage | Contact Us